Tuesday 12 May 2020

Parametrize pytest with custom class

Some times while using pytest we may end up in situation where we would like to pass a class object for assertion.
In some of situations i have come across , i used the same principal for invoking custom functions inside a module.

Below example simplify the process of passing a parameter to a pytest. This object could have n number of properties a savior when you have more then 7 parameters passed to the pytest function.


The below test code will generate 10 tests and pass random values to the class object.

Later inside pytest the passed values will be asserted.


1  Create a test class


2.  Create a list to hold random generated objects and set values of each property with a random values from a list.


3. Create a pytest with marker parametrize and pass the object list .

Monday 11 May 2020

Git Cherry pick simplified

This tutorial is written to unleash how to be hands on with Git Cherry pick. As a Prerequisite you may require git installed on your computer. The below demo is performed on Window 10  and show case  cherry pick using command line .

Please note cherry pick only brings changes under a commit.


1. Start by creating a empty folder named as cherry-pick


2. Initialize the git repository by using command : git init


3.  Create a empty file using touch command . Add the file and commit it to the master branch.


4.  Create a new branch and name it as newbranch and add two files to it using separate commits.


5.  Copy the Hash of the last commit identified by using git log command.


6. Check out the master branch and use the command git cherry-pick with the hash copied in step 5


7. You will notice that the third file will be added to the folder as we cherry picked the last commit.


8.  Repeat step 5-6 with the second last commit in the new branch.


9. You will see that after applying step 8 the second file will appear before the third file.


Monday 12 August 2019

Hands on Bokeh : Python Toast


Bokeh  library helps in interactive visualization, that targets web browsers for representation.

We are going to cover three vital aspects in plotting a simple visualization

1.  figure: Set labels of the plot using this function 
2.  show: use this to show the plot
3.  output_html: Function to select the output as target example sample.html


In action code:

#import 
from bokeh.plotting import show,figure,output_file

#Target file for plotting
output_file('First_sample.html')

#set x axis and y axis lable inside 
p=figure(x_axis_label='City',y_axis_label='Temperature in Celsius')

#draw a circle plot with color red and size 20 of each dot
p.circle([1,2,3,4,5],[10,7,15,12,2],color='Red',size=20,name='city')

# show the plot
show(p)


output:


Saturday 10 November 2018

TDD with Python

Example to Demonstrate Test driven development using Python


#write a unite test to tst the method
"""doc sting
"""
import unittest

def simple_intrest(principle, rate, time):
    """this function compute simple interest
    """
    return (principle*rate*time)/100
def amount(principle, rate, time):
    """this function compute the amount on
    i.e  simple interest + principle
    """
    return principle+simple_intrest(principle, rate, time)
class TestBanking(unittest.TestCase):
    """ the is the test class
    """
    def test_simple_intrest(self):
        """ test simple intrest
        """
        self.assertEqual(simple_intrest(1000, 8, 1), 80)
        self.assertEqual(simple_intrest(100, 8, 1), 8)
        self.assertEqual(simple_intrest(-100, 8, 1), -8)
    def test_amount(self):
        """ test amount
        """
        self.assertEqual(amount(100, 8, 1), 108)
        self.assertEqual(amount(10, 8, 1), 10.8)

RUN_TEST = TestBanking()
#call test simple intrest function
RUN_TEST.test_simple_intrest()
#call test amount function
RUN_TEST.test_amount()

Monday 3 July 2017

Jumping Scrum

Today during my Scrum Meeting I realized that some of team member’s have really a lengthy status update. 
Still must wait long before jamming in my status standing and listening to everyone out there. 
This is quite good, functional terminology or know the complexity of the work a team member is been handling day in and day out.
 However, I always feel to be more precise in saying what I did yesterday and what I am going to do today five -six lines enough to explain where the boat is heading right now. 

Sometimes I feel what if we add fitness to our scrum making it a Jumping Scrum how gonna be the salsa.

The intent is to Jog on your current position, speak your status update while you jog 😊. I understand you can run miles this way speaking.


The other advantage I see, members become more active if your scrum meeting is the first thing that you  do when you reach office every morning. 😊…. Drop your coffee mate you need to throttle while you attend your next jumping scrum… Oh yam the belly fat oh yea the fitness freak.

Wednesday 19 April 2017

Selenium Web Driver Singleton Class


Today I applied singleton design pattern for Selenium chrome driver. I wanted to share the same instance of the driver across different steps. The pattern appeared most promising to me, Luckily the pattern Singleton is the one that fill my needs

 Under The hood this time I wrote some C# code to apply the idea.


The variable Instance holds the single instance of the class.

The constructor is declared private.


This provide me the global access and a single instant of the web driver.


Love it as I would always be using one instant of it.


using System;

namespace carsales

{

   public class Driver

    {

        private static IWebDriver Instance;

        private Driver()

        {

        }

        public static IWebDriver Int()

        {

            if (Instance == null)

                Instance = new ChromeDriver();

            return Instance;

        }


        public static void Navigate(string url)

        {


            Instance.Navigate().GoToUrl(url);

        }


        public static void Close()

        {


            Instance.Close();

        }

    }

}

Tuesday 12 July 2016

Dual Boot Centos 7 and Windows 8.1

Today I set up my machine for dual boot up with CentOs7 and Windows 8.1 Under the hood. However after install  i realised that by default CentOs7 did not provided a dual boot option, leaving windows totally invisible .

I started searching and trying to resolve the issue spent about an hour  to jot down the below learning’s

To make windows boot loader appear follow the below steps.
  • Start Centos  and Launch Terminal ,perform the following command

                                    sudo grub2-mkconfig > /dev/null
  
         I was sure that the windows partitions are not anyhow visible .

  • I disabled packagekit as it was occupying the yum using this command , this disable it permanently.

                                  system disable packagekitd
  • Once the yum is available for action I performed the following commands

                                   yum install epel-release
                                   yum install ntfs-3g
  • Now rerun grub2 make

                                  sudo grub2-mkconfig > /dev/null  : 

it should show the windows partition.
  • Once the windows partition is available it’s good to save the existing grub.config


                               sudo cp /boot/grub2/grub.cfg  /boot/grub2/grub.cfg.backupoldfile
  • Now a new configuration file can be created and saved 

                               sudo grub2-mkconfig –o /boot/grub2/grub.cfg


Reboot your machine and now dual boot should be available with windows. 

Monday 30 May 2016

Yes I am a Flaky test

Every thing went well since last 10 years , till I recognized members of my team are pulling me out today from every direction giving too much attention, spending their valuable time in analysis, debug without actually understanding why I have failed.

Oh my Expert Developer, its not healthy to consumerism 1000 mg of caffeine, to tune entire Friday night just to conclude that I pass every time on development machine but some how failed when you pumped in $1000 hot fix, 

The quality head you really find critical issues but this time your issue will be marked as Not a issue 

and My dearest manager you invested too much capital to develop a solid portfolio of build evaluation tools nevertheless evaluated the quality of work the developer did based on the recent check-in. 

Oh My God this shall pass. Everyone is working really hard these days.


However being flaky test I kept watching Every time you pre-configure environment, rebuild or re-execute me.

Just to bring down your excessive stress  Its not that there is a product issue, its not that I fail regularly, its that I  have been implement with lot of dependency, I sometime lack resources during execution, some time you verdict before the actual operation is completed, sometime concurrency, some times test configurations and sometime I am run without the pre-requisites.

The grass shall have been greener on this side, if some time was spent carving me, minimizing dependency that downgrades my expertise to find a regression bug.


A research list some of the factors as Async Wait, concurrency, test order dependency, resource leak,Network ,Time,IO,Randomness,Floating point Operations, Unordered collections and something that you know which world does not know .


I get dishearten as I am on top list to be quantized, that is you may not need me to evaluate your current build  or I am getting to much emotional to be fired actually, as I am failing without providing any value addition to both developers and testers, in addition I respect the time you spend on me every-time I get into notice release after release developer after developer tester after tester that come and go time to time in this competitive world.

Being declared flaky I request you to run me couple of time to see whether I behave same, I may unlock the bug for whom I was really incepted. The project that led me to existence was a big hit and many folks working on it  dint actually knew what's going else where in the market.


If you think this is less worthy why don’t do some analysis and determine my performance on some other configuration or my behavioural  patterns from couple of days.


Oh Yes I am a flaky test but I believe I am worth execution....

Friday 27 May 2016

Code Coverage Using Google Test for unmanaged code using Visual Studio

Folks I am back with a shout out. Today we are going to walk on creating a static library in Visual c++ and will use Google test to write unit test and perform code coverage.
In this small article I will be using a set of utilities
Visual studio 2013, Google Test Runner that integrate in Visual studio for easy discovery of gtest and the finally the Google test framework. I am writing this to get a quick revision if some day I walk back again to do it again.


The very first step was to download the tool shown above

I downloaded the gtest framework and compiled the library using the following setting


Once the library is ready I created a dummy static library to get some hands on testing and named it as Win32Project1 which simply had two functions sum and sub.


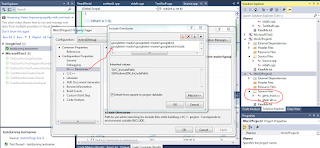
To start writing some Google test code I created a another C++ console based application and configured it with the settings to get code coverage by setting linker properties of the test project as


And advanced->profile as

Do you know that the above two settings will help me to get coverage of the api I am going to test in a while.
One these are set I created a dummy Gtest which is very basic and ran it using the test runner. Notice that I have to set of test written one from Microsoft unit testing other from google test setting applied before writing test was.

 
As the picture show sum is 100% covered however the sub is not covered as I have no test written for it in Google Tests.


Apache Beam Learning In Java Tutorials

 Wow  https://youtu.be/9kGETU63rkc